
If you just got a bread machine and have no idea what to do with it, good news! This basic guide to making your first loaf is going to help you break that machine out of the box and put your fears behind you. Bread makers are not as intimidating as they seem, and I'm going to show you how to master yours in no time.
I have a Cuisinart and a Zojirushi Virtuoso Plus bread machine but these instructions, tips and tricks should work with any brand machine.
What You Need Before You Start
Before you're first loaf you'll need to gather measuring cups, bread flour, butter or oil, yeast, salt, sugar and your bread maker. It's helpful to have oven mitts, a wire cooling rack, bread knife and storage bags nearby for when the bake is done.
a note on flour
All-Purpose V. Bread
I recommend using bread flour for basic white loaves, where the goal is a soft, fluffy and high rising bread. It has a higher protein content than all-purpose flour and will create a loaf with a better texture and crumb.
Your First Loaf, Step-By-Step
Use this recipe for a classic white sandwich loaf. It's easy and uses the basic ingredients above. It makes a 1.5 pound loaf.
Ingredients
- 1 cup warm water, approximately 110°F
- 1 tablespoon olive oil
- 2 tablespoon butter room at temperature and sliced into ¼ inch pieces
- 1 teaspoon salt
- 1 tablespoon white sugar
- 3 cups of bread flour
- 1 ¾ tsp yeast (instant or bread machine)
Instructions
- Add all ingredients to the bread pan in the order above (or follow your manuals order).
- Select the basic/white bread setting. Choose the 1.5 lb loaf size and your preferred crust color. Check the dough around 5-10 minutes into the knead. If it appears too crumbly add water 1 tablespoon at a time. If it appears too wet, add more flour 1 tablespoon at a time. Do this as many times is needed until a smooth ball that bounces back from the pan forms.
- When baking is complete, let cool for 10 minutes, then remove from the bread pan.
tips
For the best loaf, remember
- Always check the dough around 5-10 minutes in and add more flour or water if needed, in small increments until a tacky dough ball forms.
- Liquids go in first, followed by salt, sugar and flour.
- Never let the yeast and salt interact before mixing starts.
- You can remove the kneading paddle before baking begins to avoid a hole in the bottom. This is not necessary though, and the paddle can be removed once the bread is done baking.
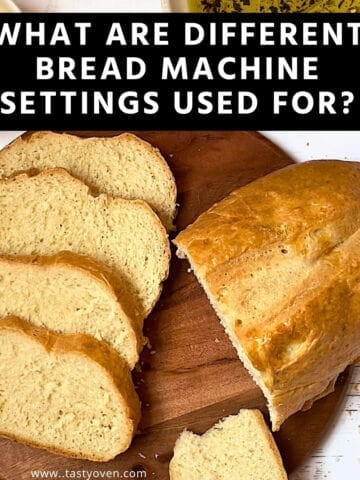
For more comprehensive information that covers how bread machines work and troubleshooting tips, check out this complete guide. And for an in-depth guide on what all those different cycles mean, see my bread machine settings explained guide.
How To Store Bread
Room temperature: Store in a sealed plastic bag, bread box or brown paper bag for 2-3 days.
Fridge: Storing bread in the fridge is okay, but not ideal. It will dry out more quickly in the fridge, so only keep there if you live in a place with high humidity.
Freezer: My favorite way to store bread! Cut into individual slices, put in a freezer-safe storage bag and freeze for up to 6 months.
What To Do When The Bake Is Done
Let the bread cool in the pan for about 10 minutes. Unplug the machine and remove the bread pan with oven mitts by pulling it gently by the handle. Turn it upside down and shake a little so the cooked bread falls out onto a cutting board. You may need to slide a rubber spatula between the sides of the loaf and the pan if it's stuck. Avoid using a knife for this- you don't want to scratch the pan's coating!
Once the bread is out of the pan, let it cool for about 20-30 minutes before slicing. It will be easier to slice when it's not warm, straight out of the oven. Once you know you'll be making bread at home for a while, a bread slicer like this is great to have. You'll get perfectly even slices!
Make sure to wash the bread pan by hand immediately. Do not use the dishwasher, as it can eventually start to rub off the pan's coating.
Your First Loaf Didn't Turn Out? Here's Why.
The most common issues with bread making and why they happen are:
- Collapsed/Sunk: if the top collapsed while baking it's usually because it was overproofed, meaning there was too much yeast or too much sugar. Next time reduce the amounts slightly.
- Dense: a dense loaf is generally caused by using too much flour, or if you used all-purpose flour and not bread flour. You can add a tablespoon of vital wheat gluten to get a more airy, chewy loaf.
- Didn't Rise: the yeast may have been dead or it mixed with the salt too early. Next time make sure the yeast hasn't expired and is separated from the salt when adding the ingredients.
I hope you found this guide helpful! Make sure to share it with other new bread makers!
What To Try Next
Once you've got a basic white loaf down, these are variations you can try next:


Comments
No Comments